In this article I will show how you can build the Rmac assembler in Visual Studio. I was facing problems in building it and when finally it worked, I am writing those settings down for future reference, maybe it will save someone’s time.
First download the rmac source code by running this command:
git clone http://shamusworld.gotdns.org/git/rmac
Or visit the official Rmac site for latest information on that.
Rmac already provides a Visual studio 2015 solution file in the source code that you can use to build, and it works fine if you open and upgrade it using VS2017 or later versions. But there is one miss. On winodws you have to provide dirent.h file. You can download the file from here:
https://github.com/tronkko/dirent?tab=readme-ov-file
Then add this file in the Visual Studio include directory. I generally copy this file to my local project folder and then include that path in Visual Studio. For this project, I created mylib folder inside the cloned rmac repository on my local hard disk. Then I included this mylib folder in Visual Studio. For that right click your project > Properties. It will open property pages. In it go to Configuration Properties > C/C++ > General and in the Additional Include Directories, select the folder where you pasted your file, in my case it was mylib folder which I created earlier.

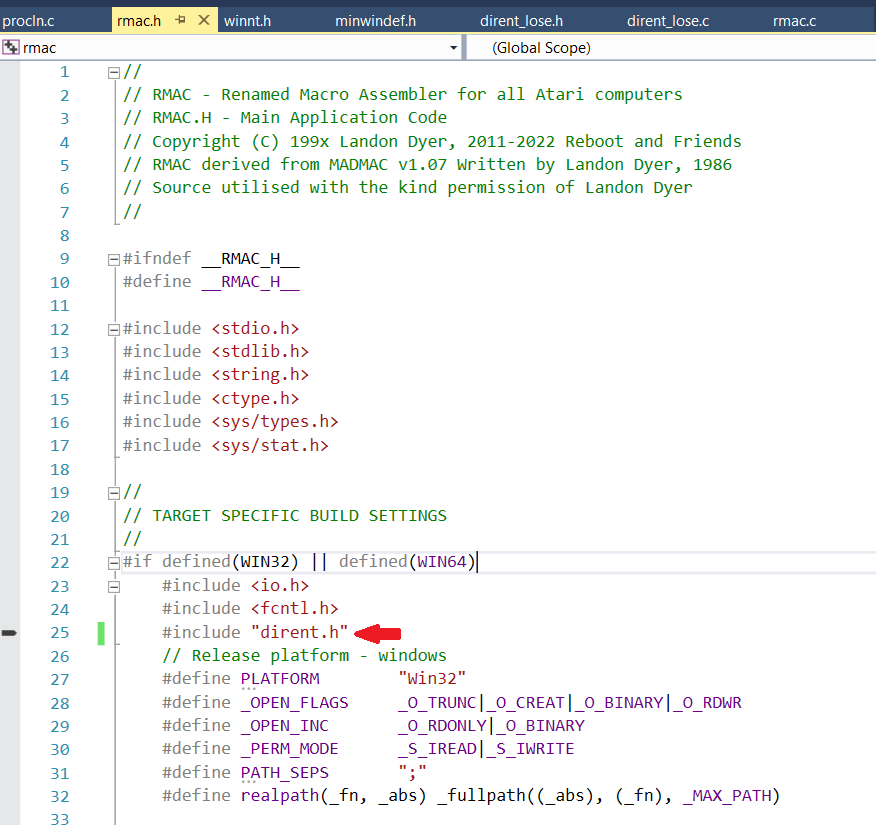
After including this file, next step is to use it. rmac uses a shim (kind of mocking feature) for dirent.h named dirent_lose.h. If you will build the project, you will get various errors. To fix that, open rmac.h file and replace dirent.h with dirent.h, like below image:
Now if you build this project, it will successfully build.
Be First to Comment