In this tutorial, I will show you how you can configure your development setup in order to debug your Unity Game or project directly from Android device. This is very helpful when your app is working fine on your development machine but behaves differently or crashes when run on any specific android device.
You will need Visual Studio installed on your system, so that we can attach the Android device as Unity instance debugger. Below are the steps:
Step 1: Inside Unity Editor, make sure you are generating development build. For that go to File -> Build Settings.. There For the Android build setting make sure “Development Build” and “Script Debugging” are selected.
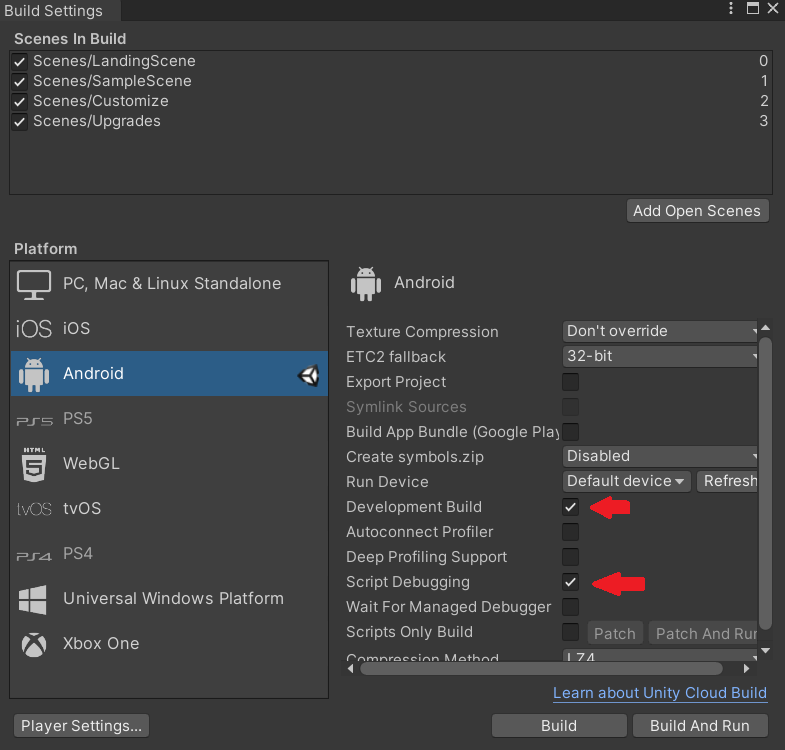
After this you can create a build. You will need to later copy this build to your Android device and install it there.
Step 2: Connect your Android Device to PC via USB cable. Make sure USB debugging is enabled on your Android device. In order to do that, you will need to enable developer option on your Android device. You can google how to do that, because steps to enable it differs based on different Android device providers and their device UI settings. In most cases below steps will work fine:
- Go to Settings
- Scroll to the bottom and select About Phone
- Now tap 7 times on ‘Build Number’ and it will say that developer options are enabled
- Return to the previous screen and find ‘Developer Options’ near the bottom
- Scroll down and select to enable ‘USB Debugging’
If you are stuck at any step then google it based on your Android device model.
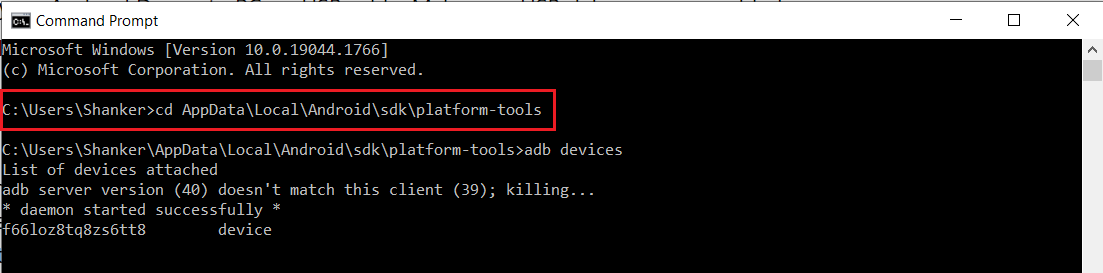
Step 3: On your PC, open the platform tools ADB location. On windows it is:
C:\Users\<Your_username>\AppData\Local\Android\sdk\platform-tools
Step 4: Inside your Android Device, Find the IP address of your device. Make sure that your Android device and your PC are on same Wi-Fi network. You can try to find it using below steps:
- Go to Settings
- Select ‘About Phone’
- Select ‘Status’
- Find ‘IP Address’ and write it down. Its better you write the IPv4.
If you are having problems following above steps to find IP address, Search on Google on how to find IP based on your Android device model.
Step 5: Now execute the below command to allow TCP connection.
adb tcpip 5555
After that execute below command to connect using the IP address:
adb connect [YourIpAddress]:5555

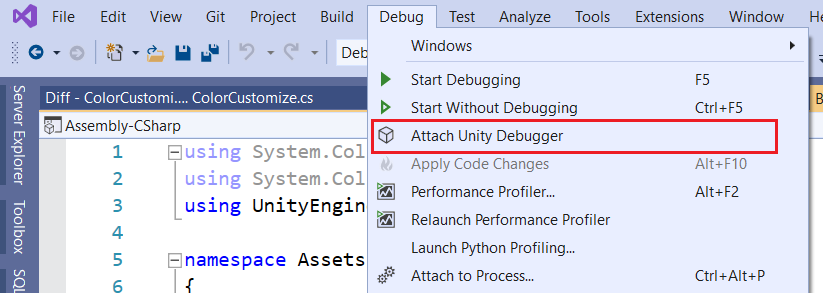
Step 6: Install the Unity Project’s .apk file you generated in step 1 in your Android device and then run it in your device. Now Open Visual Studio from Unity application (just double click any C# script file and it will load it inside Visual Studio). Go to ‘Debug’ menu option and then select ‘Attach Unity Debugger’.
It will then popup a dialog like below. Select the Android Device from there and it will start debugging.
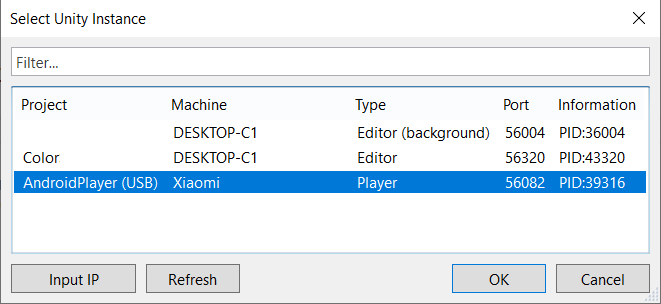
Happy debugging.
Although, this last step should work fine and you should see the Android device option, but sometimes it doesn’t work. Atleast I was not that lucky. In my case it was not showing any Android device option in “Select Unity Instance” popup. After searching online, I found one solution that it could be because of Android SDK location issues, especially If you have multiple Android SDK installed on your development PC. In my case I had Android SDK installed from Android Studio, Visual Studio Xamarin and then Unity Android SDK.
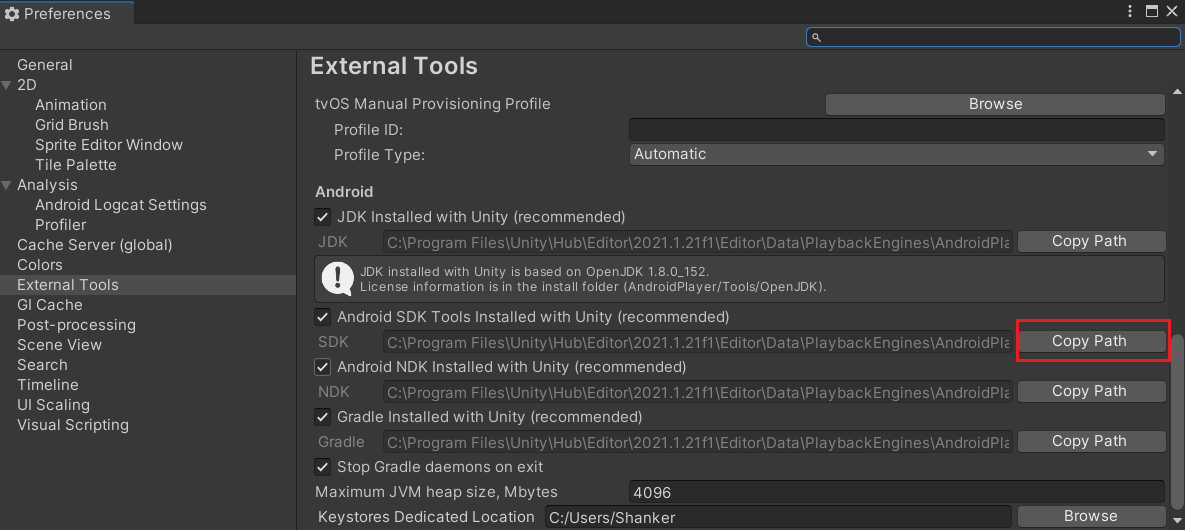
Fix: You will need to instruct Visual Studio to use the Android SDK that Unity uses. So first find out what SDK Unity is using. So, go to Unity editor, go to Edit menu, select Preferences. Inside the preference popup, go to external tools and then scroll bottom and there you will find Android SDK tools location. Copy it.
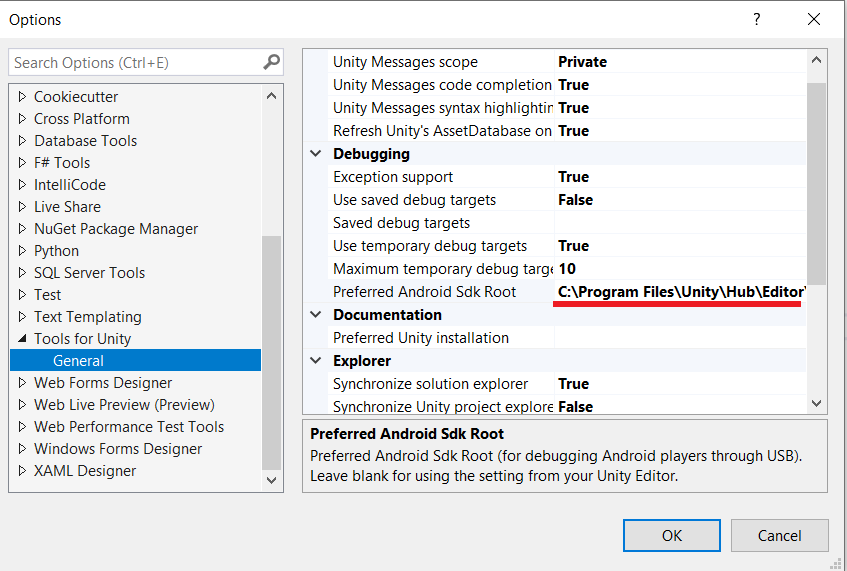
Now come back to Visual Studio and go to Tools menu and select Options. Inside the options popup, select Tools for Unity, as shown below, and inside the Debugging section, you will find “Preferred Android SDK Root”. It could be empty, as in my case, or could be populated with any other SDK location. Paste the Unity Android SDK path you copied earlier in this textbox. Click OK.
After that, if you will open the Debug -> Attach Unity Debugger again in Visual Studio, it should show the Android device. In my case it was not showing, so I restarted the Unity app inside Android device and then it showed in Visual Studio. You may need to restart android app or Visual studio. Remember, Android app must be running inside the Android device, then only it will show Android option in debugger.
If you face any issue, let me know in comments. Thanks for reading. happy coding!
save me a lot of time
thanks a lot
Glad it was helpful for you. Thanks.
Thank you this was incredibly helpful! Now I can actually debug my android application I thought it was gonna be impossible lol!